

Authentication & Authorization in Kubernetes - Using Oauth2 Proxy as Authentication Proxy


"OAuth 2.0 and OpenID Connect (OIDC) have become the de facto standards for authentication and authorization in modern web applications and APIs. In the world of Kubernetes, these technologies provide a powerful framework for securing access to your cluster resources and applications." - Jeff Atwood, co-founder of Stack Overflow
Introduction
Securing a Kubernetes cluster involves implementing authentication and authorization at either the ingress layer or the application layer. Authenticating (and sometimes authorizing) users at the ingress layer can be more efficient, as it offloads authentication logic from applications. Multiple approaches exist for implementing ingress-level authentication and authorization, and one of the most popular options is to use an external authentication proxy. Oauth2 proxy is a powerful and open-source authentication proxy that can simplify the implementation of secure authentication and authorization in Kubernetes. In this article, we are going to see the integration of Oauth2 Proxy with the NGINX ingress controller (both open source and NGINX plus version).
Why Oauth2 Proxy?
Oauth2 Proxy provides a simple and configurable way to authenticate users using OAuth2 providers such as Google, GitHub, and Okta. It also offers authorization features based on email validation, domain check or group membership. OAuth2 Proxy is containerized, making it easy to deploy and manage in Kubernetes clusters. Additionally, it's open-source software with a thriving community that consistently updates and maintains the project.
How does Oauth2 Proxy work?

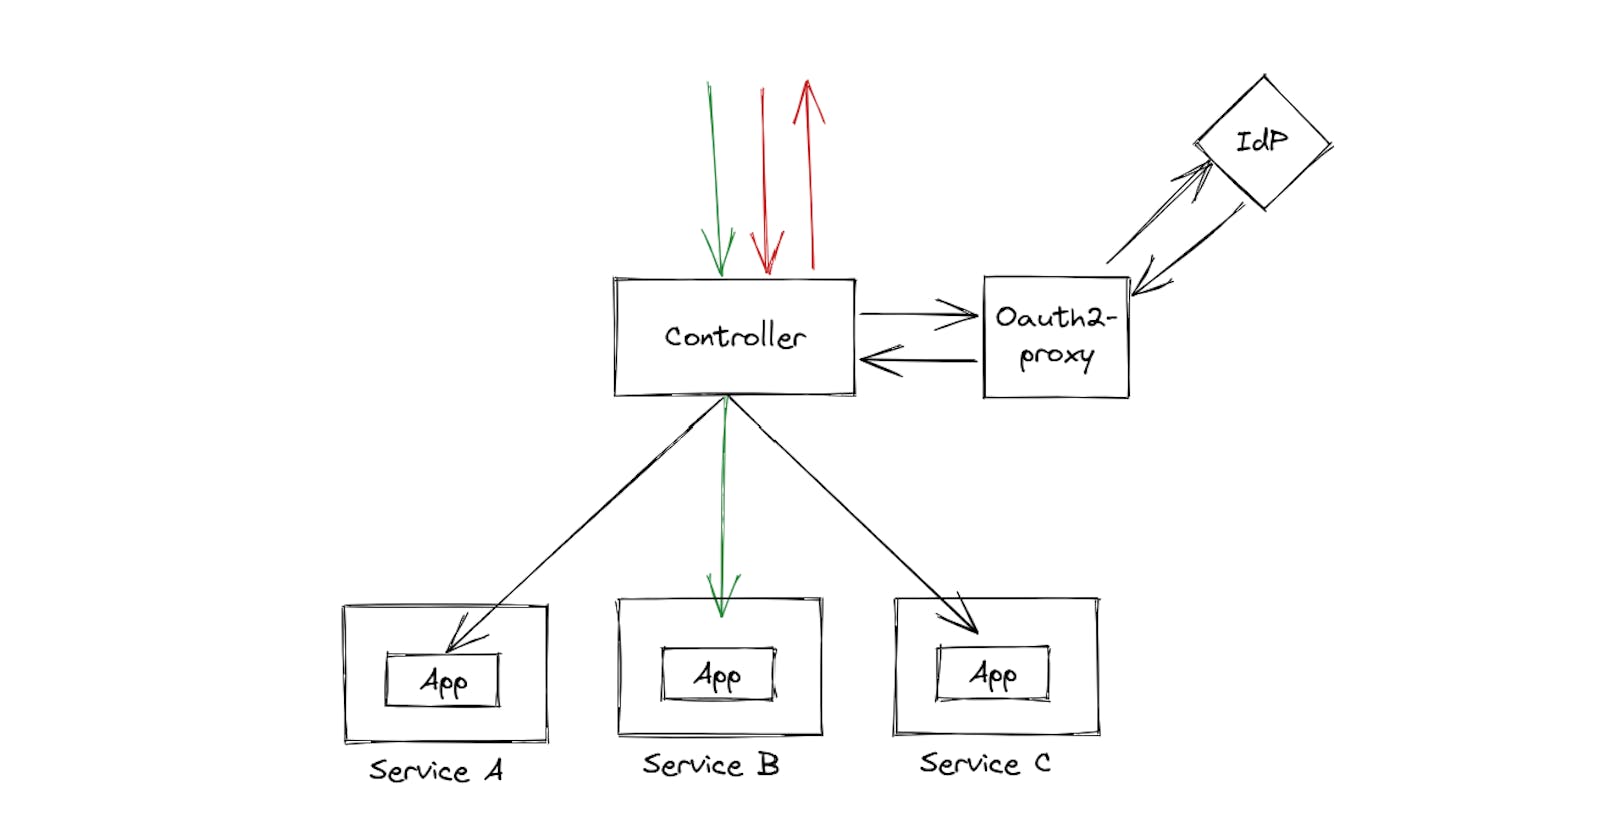
source - oauth2-proxy.github.io/oauth2-proxy
When a user tries to access a protected resource, the NGINX ingress controller sends the request to OAuth2 Proxy to check if the user is authenticated.
OAuth2 Proxy checks for a session cookie in the request, and if present, verifies the user's session details and returns a successful response.
If the session cookie is not present, OAuth2 Proxy redirects the user to the login page of the configured IdP (such as Google or GitHub).
The user logs in to the IdP and is redirected back to OAuth2 Proxy, which receives the user's information from the IdP.
OAuth2 Proxy creates a new session for the user using this information and sets a session cookie in the response.
The NGINX ingress controller receives the successful response from OAuth2 Proxy and allows the user to access the requested resource.
Installation and Configuration of Oauth2 Proxy
There are multiple ways to install Oauth2 Proxy, you can check them out at oauth2-proxy.github.io/oauth2-proxy/docs. Here we are going with Kubernetes manifest files.
Create a new file oauth2-proxy.yaml and paste the following manifest into it. Make sure to change values annotated with comments according to your IdP configuration.
apiVersion: apps/v1
kind: Deployment
metadata:
  labels:
    k8s-app: oauth2-proxy
  name: oauth2-proxy
  namespace: oauth2-proxy-ns
spec:
  replicas: 1
  selector:
    matchLabels:
      k8s-app: oauth2-proxy
  template:
    metadata:
      labels:
        k8s-app: oauth2-proxy
    spec:
      containers:
      - args:
        - --provider=oidc
        # if using azure provide tenant id, other wise remove line below
        - --azure-tenant=<tenant-id> # replace with your tenant id
        - --oidc-issuer-url=<issuer-url> # replace with your OIDC IdP's issuer url
        - --scope=openid groups profile email
        - --email-domain=*
        - --upstream=static://200
        - --http-address=0.0.0.0:4180
        env:
        - name: OAUTH2_PROXY_CLIENT_ID
          value: <client-id> # replace with client id
        - name: OAUTH2_PROXY_CLIENT_SECRET
          value: <client-secret> # replace with client secret
        - name: OAUTH2_PROXY_COOKIE_SECRET
          value: "bVbMfxlt8Wmq4E1OYTICqS_AZHTeVDUEdFP5LGbY05c" # replace with value of: python -c 'import os,base64; print(base64.urlsafe_b64encode(os.urandom(32)).decode())'
        image: quay.io/oauth2-proxy/oauth2-proxy:latest
        imagePullPolicy: Always
        name: oauth2-proxy
        ports:
        - containerPort: 4180
          protocol: TCP
        resources:
          limits:
            cpu: 100m
            memory: 128Mi
          requests:
            cpu: 100m
            memory: 128Mi
---
apiVersion: v1
kind: Service
metadata:
  labels:
    k8s-app: oauth2-proxy
  name: oauth2-proxy
  namespace: oauth2-proxy-ns
spec:
  ports:
  - name: http
    port: 4180
    protocol: TCP
    targetPort: 4180
  selector:
    k8s-app: oauth2-proxy

---
apiVersion: networking.k8s.io/v1
kind: Ingress
metadata:
  name: oauth2-proxy
  namespace: oauth2-proxy-ns
  annotations:
    # For ingress-nginx (open source nginx ingress controller) only.
    nginx.ingress.kubernetes.io/proxy-body-size: "2000m"
    nginx.ingress.kubernetes.io/proxy-buffer-size: "32k"
    # For nginx-ingress (NGINX plus ingress controller) only.
    nginx.org/client-max-body-size: "2000m"
    nginx.org/proxy-buffer-size: "32k"
spec:
  ingressClassName: nginx
  rules:
  - host: "example.com" # change to your domain
    http:
      paths:
      - path: /oauth2
        pathType: Prefix
        backend:
          service:
            name: oauth2-proxy
            port:
              number: 4180
There are several important modifications to make:
azure-tenant: If you're using Azure as your identity provider, you'll need to specify the tenant ID of your Azure account. If you're not using Azure, you can remove this line from the manifest.oidc-issuer-url: The issuer URL is typically specified in your identity provider's portal. For example, the issuer URL for Azure ishttps://sts.windows.net/<tenant-id>/.OAUTH2_PROXY_CLIENT_ID: This is the client ID provided by your identity provider. For example, in Azure, your client ID will be the application ID of the enterprise application you created.OAUTH2_PROXY_CLIENT_SECRET: This is the client secret provided/generated by your identity provider. For example, in Azure, you can create a secret in the Enterprise application by going to the Certificates and Secrets section and providing it here as the client secret.OAUTH2_PROXY_COOKIE_SECRET: This secret is used during cookie data encryption. You can provide a random secret, or generate one by running the following command on a Python-installed machine:
python -c 'import os,base64;print(base64.urlsafe_b64encode(os.urandom(32)).decode())'
host: Change the hostname to your specific domain name.Make sure to use annotations specified for your particular version of the NGINX Ingress Controller. These annotations are helpful when the cookie size is larger than usual. For example, Azure’s cookies are often larger than normal.
To deploy OAuth2 Proxy in your Kubernetes cluster, simply run the following command:
kubectl apply -f oauth2-proxy.yaml
Once deployed, OAuth2 Proxy will be hosted at “http://example.com/oauth2".
For more information on configuring OAuth2 Proxy to work with your specific identity provider, check out the official documentation at https://oauth2-proxy.github.io/oauth2-proxy/docs/configuration/oauth_provider.
Configuration of NGINX Ingress Controller
Now that you have successfully installed and configured Oauth2 Proxy, it's time to configure the NGINX ingress controller. The NGINX ingress controller comes in two versions: the open-source version (commonly referred to as ingress-nginx) and the plus version (commonly referred to as nginx-ingress). Both versions offer similar base features, but the plus version includes additional features and an SLA, making it suitable for production use.
To enable authentication with Oauth2 Proxy, the NGINX ingress controller provides several annotations that can be used to integrate Oauth2 Proxy as an external authentication proxy. These annotations are applied per ingress, which means that you can use different authentication methods for different applications. For this example, create a new file called demo-app.yaml and paste the following manifest into it:
apiVersion: apps/v1
kind: Deployment
metadata:
  name: demo-app
  namespace: demo-app-ns
  labels:
    app: demo-app
spec:
  replicas: 1
  selector:
    matchLabels:
      app: demo-app
  template:
    metadata:
      labels:
        app: demo-app
    spec:
      containers:
      - name: nginx
        image: nginx
        ports:
        - name: http
          containerPort: 80
        imagePullPolicy: IfNotPresent
---
apiVersion: v1
kind: Service
metadata:
  name: demo-app-svc
  namespace: demo-app-ns
  labels:
    app: demo-app
spec:
  selector:
    app: demo-app
  ports:
    - protocol: TCP
      port: 80
      targetPort: 80
---
apiVersion: networking.k8s.io/v1
kind: Ingress
metadata:
  annotations:
    nginx.ingress.kubernetes.io/auth-url: "https://$host/oauth2/auth"
    nginx.ingress.kubernetes.io/auth-signin: "https://$host/oauth2/start?rd=$escaped_request_uri"
  name: demo-app-ingress
  namespace: demo-app-ns
spec:
  ingressClassName: nginx
  rules:
  - host: "example.com"
    http:
      paths:
      - path: /
        pathType: Prefix
        backend:
          service:
            name: demo-app-svc
            port:
              number: 80
nginx.ingress.kubernetes.io/auth-url: This annotation specifies the URL where the ingress controller will forward authentication requests. In our example, we set it to Oauth2 Proxy’s
/authendpoint, which returns a202 Acceptedor401 Unauthorizedresponse.nginx.ingress.kubernetes.io/auth-signin: This annotation specifies the URL where users will be redirected when authentication is required. In our example, we redirect users to the
/startendpoint, where Oauth2 Proxy will begin the Oauth cycle and authenticate the user.
To deploy the demo application, execute the following command:
kubectl apply -f demo-app.yaml
This will deploy the demo application in your Kubernetes cluster and make it accessible at http://example.com.
Final Result
With the NGINX ingress controller and demo application configured, we can now test out our example. Navigate to the domain you specified in the manifest file for the host attribute. For instance, if you set “example.com” as the host, visit http://example.com/ in your web browser.
Upon accessing the application URL, you will be automatically redirected to the login page of your Identity Provider (IdP) to authenticate. For example, the Azure AD IdPs login page would be like this:
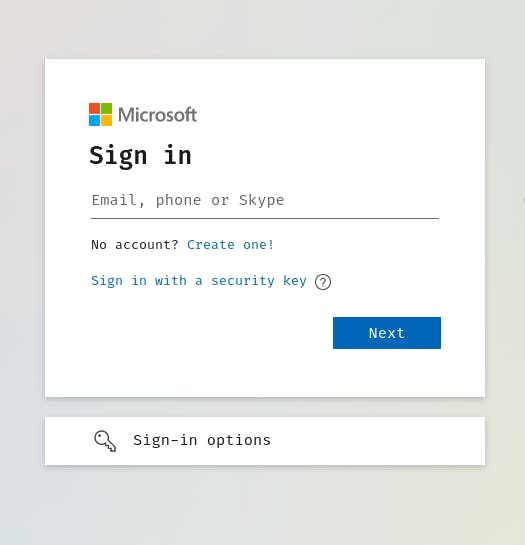
Once you have successfully logged in, you will be redirected back to the demo application, and you can begin to interact with it.
Congratulations, you have successfully integrated OAuth2 Proxy with the NGINX ingress controller to provide secure external access to your Kubernetes application.
Authorization using Oauth2 Proxy
OAuth2 proxy provides powerful authorization features that can help you to restrict access to your applications. You can use one or more of the following query parameters in the /auth endpoint to configure the authorization settings:
allowed_emails: This parameter allows you to specify a comma-separated list of email addresses that are allowed to access the application. For example:
nginx.ingress.kubernetes.io/auth-url: “https://$host/oauth2/auth?allowed_emails=dev1@example.com,dev2@example.com"
When a user logs in, their email address is checked against the list of allowed email addresses. If it matches one of the email addresses on the list, access is granted.
allowed_email_domains: This parameter allows you to specify a comma-separated list of email domains that are allowed to access the application. For example:
nginx.ingress.kubernetes.io/auth-url: “https://$host/oauth2/auth?allowed_email_domains=example.com,foobar.com"
When a user logs in, their email domain is checked against the list of allowed email domains. If it matches one of the domains on the list, access is granted.
allowed_groups: This parameter allows you to specify a comma-separated list of groups whose members are allowed to access the application. For example:
nginx.ingress.kubernetes.io/auth-url: “https://$host/oauth2/auth?allowed_groups=admin,mgmt"
After a user logs in, the OAuth2 proxy checks if they are a member of one of the allowed groups. If they are a member of one of the groups on the list, access is granted.
By using one or more of these parameters, you can control who has access to your applications and ensure that only authorized users can log in.
Best Practices
Keep OAuth2 Proxy and Nginx Ingress Controller up-to-date with the latest releases to ensure the security of your environment.
Use separate OAuth2 Proxy instances for different Kubernetes namespaces or applications to increase the security of your environment.
Use a dedicated service account for OAuth2 Proxy and grant it only the necessary permissions to limit its access to the cluster.
Avoid storing OAuth2 Proxy secrets, such as client ID and secret, in plain text files or environment variables. Use Kubernetes secrets to store them securely.
Use HTTPS for all communication between OAuth2 Proxy and Nginx Ingress Controller to protect against eavesdropping and data tampering.
Use appropriate timeouts and limits for OAuth2 Proxy and Nginx Ingress Controller to prevent denial-of-service attacks and optimize resource utilization.
When configuring OAuth2 Proxy authorization, choose the most restrictive method possible for your use case. For example, use email validation instead of allowing all users from a particular domain, or use group membership validation instead of allowing all authenticated users.
When using group membership validation, use unique group names that are specific to your application. Avoid using common group names like “admin” or “user” as this can cause conflicts with other applications or services.
Conclusion
In conclusion, we have seen how to secure Kubernetes applications using OAuth2 Proxy and Nginx Ingress Controller. By integrating external authentication and authorization mechanisms, we can enhance the security of our applications and protect them from unauthorized access. We have learned how to install and configure OAuth2 Proxy and Nginx Ingress Controller, how to use annotations to customize their behaviour, and how to apply best practices to ensure the security of our environment.
Implementing these techniques will help you to build a robust and secure Kubernetes infrastructure that meets the highest standards of security and compliance. We encourage you to experiment with these tools and explore their full potential to create a safe and efficient environment for your applications. Thank you for reading, and we hope this article has been helpful to you!
To explore other approaches for securing applications in a Kubernetes cluster, you can check out our previous blog post on Authentication & Authorization in Kubernetes Cluster — https://adityaoo7.hashnode.dev/authentication-authorization-in-kubernetes-cluster.
References
The official OAuth2 Proxy documentation: https://oauth2-proxy.github.io/oauth2-proxy/
The official Nginx Ingress Controller documentation: https://docs.nginx.com/nginx-ingress-controller/intro/overview/
The Open Source Nginx Ingress Controller documentation: https://kubernetes.github.io/ingress-nginx/
Oauth2 Proxy endpoints: https://oauth2-proxy.github.io/oauth2-proxy/docs/features/endpoints
Kubernetes documentation on securing your cluster: https://kubernetes.io/docs/tasks/administer-cluster/securing-a-cluster/